This blog post article is part of a series of articles on assessment of the low back and pelvis. Scroll to the end of this article to see the others in this series.

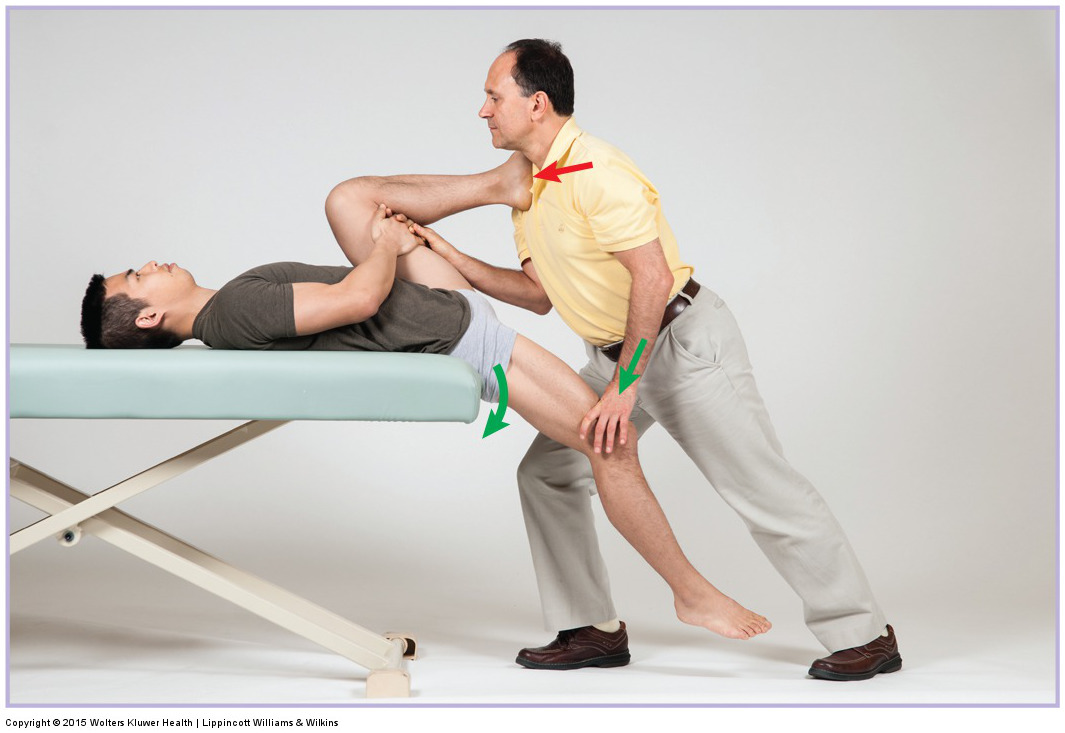
Hip flexor stretch. Permission Joseph E. Muscolino DC
www.learnmuscles.com
What is most important when assessing and treating the low back and pelvis is to understand the mechanisms of lumbar, pelvic, and hip joint function. When a person has a pathologic condition, the mechanics of these regions are altered. This alteration usually results in a tissue or tissues whose integrity has been compromised. Knowing this can help guide the therapist’s assessment of the client’s condition. The essence of the physical examination process is to further stress the compromised tissue with the intention of reproducing or creating signs or symptoms of the problem. If the therapist understands the mechanics that underlie pathologic conditions, it is possible to use critical thinking to reason out not only which tissues are stressed but also how to further stress those tissues. In this manner, almost every assessment test can be thought through logically and understood without rote memorization.
Note: Signs and Symptoms
When an assessment test yields signs and/or symptoms, it is important to distinguish between the two. A symptom, by definition, is subjective in nature and can be experienced only by the client. For example, pain is a symptom. No one can tell the client that he or she does or does not have pain; only the client can report having pain and what level it is. In contrast, a sign, by definition, is objective—that is, the therapist can verify and report it. The degree of the sign can also often be measured. For example, when a client is performing joint range of motion (ROM), the therapist can objectively determine whether the client’s motion is decreased and even measure it in degrees. The client history and exam should include both the objective signs found and the subjective symptoms that the client reports.
Positive and Negative Findings
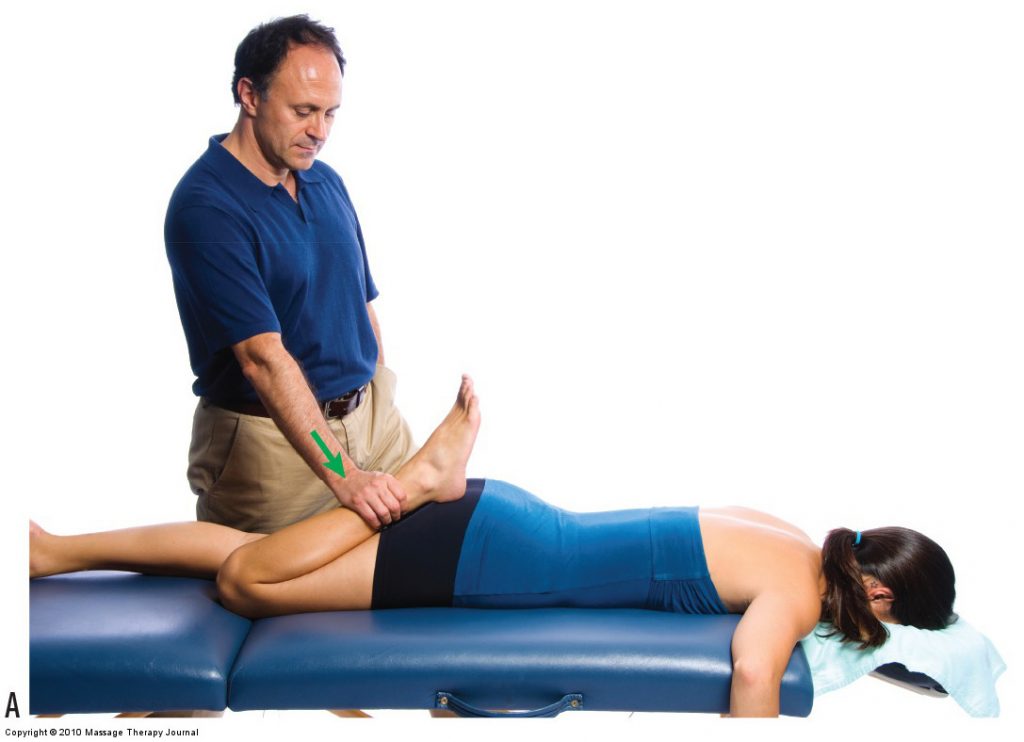
Nachlas orthopedic assessment test. Permission Joseph E. Muscolino. www.learnmuscles.com
If a physical examination assessment test reproduces signs and/or symptoms of the condition, it is a positive test result, and the therapist knows that tissue is unhealthy. For example, if Nachlas’ test (a special assessment test for the sacroiliac joint [SIJ]) results in pain in the SIJ, the test result is considered to be positive for a pathologic condition of the SIJ. If no signs or symptoms are reproduced, then it is a negative test result. A negative test result may indicate one of two things: either the client does not have the condition or the degree of the condition is mild and below the threshold to yield a positive finding. Every assessment procedure has a certain sensitivity to detecting the presence of the condition for which it is designed.
It is important to note that if the physical examination test creates signs and symptoms, but not the signs or symptoms of the condition for which the test is designed, then the assessment test result is still considered to be negative. In the case of Nachlas’ test, knee pain that occurs during the procedure does not indicate injury to the SIJ, even though knee pain is a symptom reported by the client. Knee pain during the assessment test is likely due to the knee joint compression that occurs during the test and is not relevant to assessment of the SIJ.
When assessing the client’s low back and pelvis, it is important to perform all pertinent physical examination assessment procedures. Even if one test result is positive and indicates that the client has a certain condition, the other assessment procedures should still be done because a client may have more than one condition.
The following are the components of a thorough physical examination assessment of the client’s low back and pelvis:
- Postural assessment
- Active and Passive Range of Motion (ROM) and manual resistance (MR)
- Palpation
- Joint play/mobilization
- Special assessment tests
This blog post article is the 3rd in a series of 18 blog posts on the subject of assessment of the low back and pelvis.
The blog post articles in this series are:
- Introduction to Assessment of the Low Back and Pelvis
- Health History
- Introduction to Physical Assessment Examination of the Low Back and Pelvis
- Postural Assessment of the Low Back and Pelvis
- Range of Motion and Manual Resistance Assessment of the Low Back and Pelvis
- Muscle and Bone Palpation of the Low Back and Pelvis
- Joint Motion Palpation Assessment
- Overview of Special Orthopedic Assessment Tests of the Low Back and Pelvis
- Straight Leg Raise Tests for Space-Occupying Lesions
- Cough Test and Valsalva Maneuver
- Slump Test
- Piriformis Stretch Test
- Straight Leg Raise and Manual Resistance Tests for Strains and Sprains
- Nachlas and Yeoman’s Tests
- Sacroiliac Joint Medley of Tests
- Treatment Strategy for the Low Back and Pelvis
- Self-Care Advice for the Client with a Low Back / Sacro-Iliac Joint Condition
- Brief Review of Assessment and Treatment of Conditions of the Low Back and Pelvis